How to Steam Milk (With Gifs!)
Have you ever marveled at the work of art that a carefully crafted latte or cappuccino can be? It is rare that one receives a drink at the perfect sipping temperature with sweet bubble-less foam that gently glides down the back of your tongue.
(We’ve been on gif kick lately and may have gone a little crazy in this post)
I doubt there is a single person who drinks specialty coffee beverages on regular basis that hasn’t had the reverse experience of tasting a truly awful, scorched, burnt latte (possibly the work of their own hands). Just in case you feel motivated to enjoy espresso preparation, we’ve decided to give you some tips on how to steam milk like a champ.
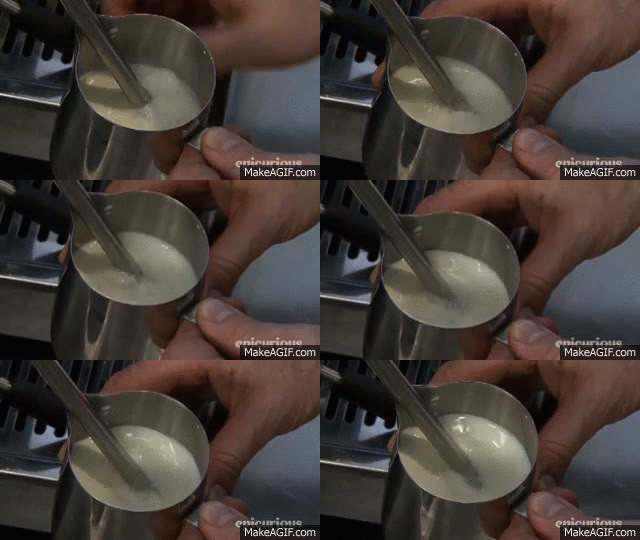
Pour the appropriate amount of milk in the pitcher. This amount will vary depending on how large the drink is. If you are making a 16oz latte, you want to fill a 20oz pitcher just below the base of the spout. Ideally, both your milk and pitcher should be cold.
You want to clean all of the leftover milk and water out of the wand before you steam your milk by turning on the wand for a second. This step is known as “purging” the steam wand.
Place the tip of the steam wand into the pitcher about a ½ inch under the surface of the milk. You are now ready to begin steaming the milk. The milk heats up very quickly and you will need to react quickly.
Release the steam! As soon as the milk starts undulating, bring the tip of the wand to the surface of the milk immediately. You will hear a loud gurgling noise (this is how the foam is made). This process is called “stretching. Keep the wand in place at the surface for about 3 seconds if your making a latte and 8 seconds if you’re making a cappuccino.
If you are creating large bubbles, the tip of the wand is too far above the surface of the milk and you will need to immerse it further down.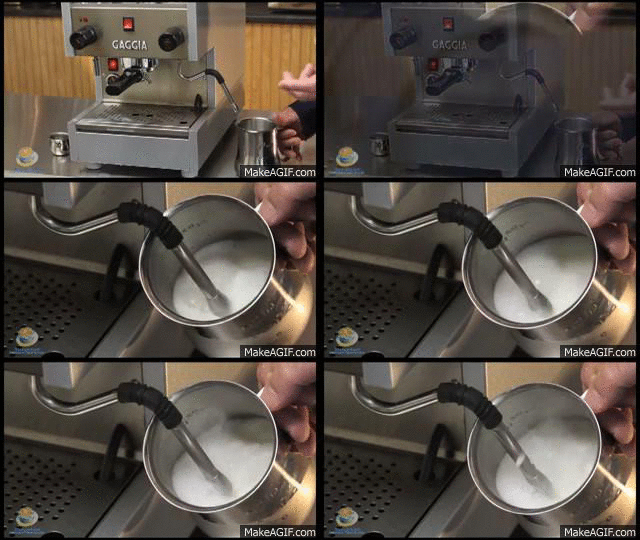
Move wand tip below surface and towards the edge of the pitcher to make the milk spin in a vortex. When you find the “sweet spot” wherethe milk is spinning rapidly you will be creating thick, creamy, barely visible bubbles throughout the milk in a process called “texturizing.” If you get the milk swirling fast enough you will pop the larger bubbles you made at the beginning. The end product will be thick creamy foam resembling wet paint known as “microfoam.” If you are using a home espresso machine you may have difficulty getting the milk to spin due to lack of steam pressure, but with enough practice you should be able to rotate the milk sufficiently.
As you are steaming the milk, you should have one hand holding the pitcher in place while the other is tapping the outside of the pitcher every couple of seconds. You might find it worthwhile to invest in a milk steaming thermometer that measures the temperature of the milk while you’re steaming it. Turn the steam off right when the pitcher becomes too hot to touch. The milk heats up quickly and you must be vigilant to ensure that that the milk isn’t steamed to hot (it will taste and smell bad!).
To give the milk a glossy sheen and to pop larger bubbles, tap the bottom of the pitcher on the counter and swirl the pitcher gently.
The final product should have three important qualities.
- Proper Volume (after you’ve filling the cup you haven’t left too much in the pitcher or too little in the cup)
- A stable temperature between 140-150 degrees (this is a comfortable temperature for consumption)
- Proper amount of foam after the drink has had a few moment to settle (¼ inch latte, ½ inch cappuccino)
- Can be measured by gently pulling a spoon across the top
If you’ve managed to do this successfully, you’re one step closer to being a pro, and your friends should be impressed.
* Here’s a great tip for the frugal amateur barista. You don’t have to waste gallons of milk learning how to make delectable microfoam. Put one drop of dish soap into a steam pitcher that contains cold water and steam it as if it were regular ol’ whole milk. When you stretch the the soap water a layer of foam will appear at the top of the water. Measure foam with a spoon and temperature with a thermometer to make your sure you are hitting all of the marks. You only have to use milk when you feel 100% prepared.
Good Luck!

